
Release
/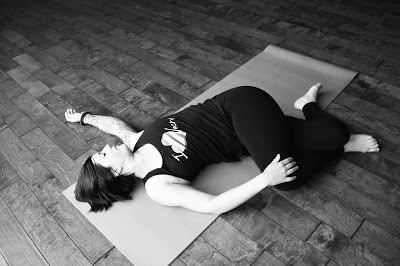
Photo by Brynna Bryant.
It is as temporary as the changing colors of the sunset.
Something new will follow soon.
Release your attachment.


Half the battle in headstand is overcoming fear.
What stories do you tell yourself about what you're capable of? How true are they?
I remember when I first started practicing headstand, I felt scared and hesitant. I'd try walking my hips up over my head but then back off and take child's pose. I'd watch other people in the room. In my mind, I was telling myself,
I'm weak, I can't do this, my neck isn't strong enough.
Eventually I realized that story is false. It was wrapped up in experiences I've seen other people go through-- family and friends with back and neck issues.
The reality is that I have a strong back and strong neck. A healthy spine.
I was telling myself an untrue story, rather than being present to the moment. All I needed was an open mind and to practice the balance.
Many headstands later, I now enjoy this pose.
If you're feeling stuck with an inversion (or any pose, really), try questioning your fear. Release it. Become incredibly receptive to this moment.

The headstand pose (Sirsasana) is often called the “king of asanas” for good reason. This empowering inversion builds strength, boosts circulation, and sharpens focus. Yet for many yogis, it’s also one of the most intimidating poses to learn.
Whether you’re just starting your journey into inversions or looking to refine your technique, this guide will walk you through the essentials of headstand pose. From preparation and alignment to overcoming common fears, these tips will help you build a safe, confident, and enjoyable headstand practice.
Before attempting headstand, it’s crucial to develop strength and stability in the muscles that support your inversion. Focus on your core, shoulders, and upper back, as these areas will carry much of your weight in the pose.
Dolphin Pose: This strengthens the shoulders and prepares your arms for weight-bearing.
Plank Pose: Builds overall core stability, which is essential for balance.
Forearm Plank: A variation of plank that specifically targets the muscles needed for headstand.
Boat Pose: Engages the deep core muscles and improves balance.
Incorporate these prep poses into your regular practice to build endurance.
Focus on proper alignment in each pose to avoid overusing certain muscles.
Don’t rush! Building strength over time ensures you’ll approach headstand safely.
Setting up correctly is half the battle when it comes to headstand. A strong, stable base will support your body and reduce the risk of injury.
Start in a Kneeling Position: Kneel on your mat and interlace your fingers to create a tripod base for your head and forearms.
Place Your Head on the Mat: Rest the crown of your head lightly on the mat, with the back of your head cradled in your hands.
Engage Your Shoulders: Press your forearms firmly into the mat and lift your shoulders away from your ears to avoid collapsing into your neck.
Lift Your Hips: Straighten your legs and walk your feet toward your head, bringing your hips over your shoulders.
Keep your elbows shoulder-width apart; don’t let them flare out.
Distribute weight evenly between your head and forearms.
Engage your core to maintain stability as you lift your legs.
One of the most challenging parts of headstand is lifting your legs off the ground in a controlled manner. Practicing leg lifts will help you build the necessary core strength and body awareness.
Tuck Position: Start by lifting one leg at a time, then both knees into your chest. This reduces the lever effect and makes balancing easier.
Straight-Leg Lift: Gradually practice lifting both legs straight into the air. This requires more strength and control but improves alignment.
Wall Support: Practice near a wall for extra stability as you gain confidence.
Move slowly and with control to prevent kicking up, which can throw off your balance.
Focus on engaging your lower belly to lift your legs smoothly.
Use the wall as a guide but aim to rely on your own strength over time.
Headstand is a challenging pose, and even experienced yogis can fall into bad habits. Here are some common mistakes and how to fix them:
The Fix: Actively press into your forearms to lift your shoulders away from your ears. This protects your cervical spine and distributes weight more evenly.
The Fix: Engage your core and tuck your tailbone slightly to maintain a neutral spine. Think of stacking your hips over your shoulders and your shoulders over your head.
The Fix: Use the wall as a training tool but don’t become dependent. Gradually move away from the wall as you build strength and confidence.
The Fix: Inversions can feel intense, but steady breathing helps you stay calm and focused. Practice slow, deep breaths throughout the pose.
Balancing in headstand requires a mix of physical strength, alignment, and mental focus. Once you’re comfortable lifting your legs, the next step is learning how to maintain stability.
Engage Your Core: A strong core is the key to holding your balance in any inversion. Think of drawing your navel toward your spine.
Fix Your Gaze: Choose a point on the floor to focus on and keep your eyes steady.
Micro-Adjust: Subtle shifts in your weight can help you stay balanced. Use your fingers and forearms to make small corrections.
Imagine your body as a straight line from your head to your toes. Visualizing this alignment can help you find and maintain balance more easily.
Safety should always come first when practicing inversions. Headstand can put pressure on your neck and spine, so it’s important to approach the pose mindfully.
Warm Up Thoroughly: Never attempt headstand without properly warming up your shoulders, neck, and core.
Avoid Overloading Your Neck: If you feel any pain or discomfort in your neck, come out of the pose immediately.
Use Props: A folded blanket under your head or forearms can provide extra support and cushioning.
If you have a neck injury, high blood pressure, or any other medical condition that might be aggravated by inversions, consult your doctor or yoga teacher first.
Headstand is a pose that takes time to master. Celebrate small victories along the way, whether it’s holding the pose for a few seconds or lifting one leg off the ground.
Set realistic goals for your practice, such as holding headstand for five breaths.
Practice consistently, but don’t overdo it. A few minutes of focused practice each day is better than long sessions that tire you out.
Document your progress with photos or journal entries to track your growth.
Mastering headstand isn’t just about physical strength—it’s also about mental resilience. Fear of falling is one of the biggest barriers to learning inversions, but with the right mindset, you can overcome it.
Practice near a wall for added security as you build confidence.
Use props like a bolster or pillows to create a soft landing zone.
Remind yourself that falling is part of the process—and it’s how you learn.
Embrace the journey instead of fixating on the end result.
Celebrate small milestones, like holding the pose for a few seconds longer than before.
Trust that consistent effort will lead to improvement over time.
Inversions like headstand can be intense, so it’s important to balance your practice with restorative poses that release tension in your neck and shoulders.
Child’s Pose: A gentle stretch for the neck and shoulders.
Seated Neck Stretches: Relieves tightness in the cervical spine.
Reclining Bound Angle Pose: Opens the chest and promotes relaxation.
If you’re struggling with headstand, don’t hesitate to ask for help. A knowledgeable yoga teacher can provide personalized feedback, hands-on adjustments, and encouragement.
Prevents bad habits that could lead to injury.
Helps you understand the finer points of alignment.
Boosts your confidence with tailored advice.
Headstand is more than just a yoga pose—it’s a practice in patience, courage, and self-discovery. Whether you’re learning to lift your legs for the first time or refining your balance, remember that every step of the journey is worth celebrating.
Approach headstand with curiosity and a sense of playfulness. With consistent practice and the tips outlined here, you’ll not only master the pose but also build strength and confidence that will serve you on and off the mat.


Photos by
.
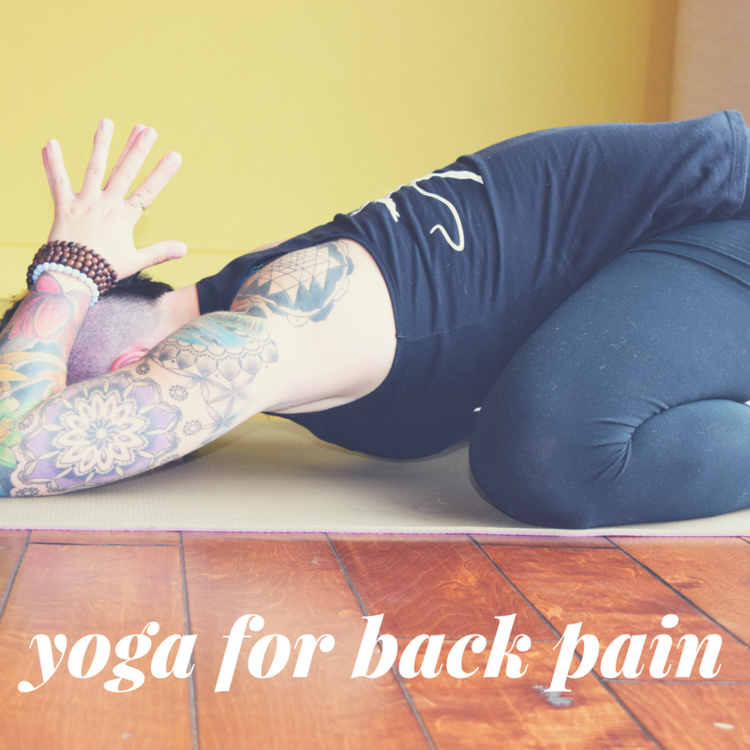
Does your back hurt?
Most of us suffer from back pain at one time or another, and this discomfort can range from a dull ache to severe, debilitating pain.
If you're experiencing back pain, yoga can help. A simple daily routine helps keep your spine healthy and flexible. 'Happy spine, happy life!' as the saying goes. Yoga also relieves tightness in the hamstrings, legs, and back muscles.
Here are some simple yoga poses to help relieve back pain. Please move through them slowly and mindfully, letting your breath guide you.
I also highly recommend reading
by John Sarno. This book completely changed the way I think about back pain, and helped me deepen my understanding of the mind-body connection. May you find healing and relief! Please feel free to ask any questions in the comments below :)

Cat / Cow
Start on hands and knees, with the wrists under the shoulders and the knees under the hips. Spread your fingers wide on the mat, and press firmly down through the palms. As you exhale, round the spine and look in at your belly, drawing the navel in toward the spine.

On the inhale, let your belly soften, draw the shoulder blades down the back, and peek your gaze up.

Continue moving between cat and cow for 5-10 rounds.
This is a great exercise to do first thing in the morning, during the middle of the day if you feel tired or stiff, or just before bed, to release tension so that you sleep comfortably.

Child's Pose
Take your knees wide on the mat, big toes together to touch. Let your upper body come down to the mat, resting your torso between your thighs and letting your forehead touch the mat. Tune in to your breath here. Notice how the rib cage expands as you breathe.
If your chest and upper body don't come all the way down to the floor, you can place a blanket, pillow or bolster under you. You can also place a folded or rolled blanket between your thighs and calves for added support.


Child's pose is meant to be a resting pose, so find a version that feels comfortable! You can have your arms long in front, the palms flat on the ground, or bring your arms along your sides, placing the backs of the hands on the mat near your feet.
Holding Child's pose for 3-4 minutes twice a day can make a huge impact on how you feel. This pose stretches the hips, thighs and ankles and also passively lengthens the muscles of the back torso. New oxygenated blood reaches the brain, reducing stress and fatigue, and helping give you a calm, centered feeling. With the knees a little closer together and the belly resting on the thighs, Child's pose also flexes the body's internal organs and keeps them supple, improving digestion.

Forward Fold
Stand with your feet at hips width. On an inhale, sweep the arms overhead, bringing the palms together to touch. On an exhale, swan dive forward over the legs, bringing the hands down to the mat.
Bend the knees as much as you need in order to let the chest rest down on the thighs. Feel both big toes heavy on the mat. Relax the head and neck completely, no tension in the neck. Take 10 deep breaths here, letting the weight pour down through your feet. You can even picture any worries or concerns pouring out the top of the head, releasing them. This pose is great for any time you need to de-stress or feel more grounded.

Supported Bridge Pose
Place a block under your sacrum, on whichever setting feels comfortable. Gently draw the knees toward each other, and allow your body to relax. Breathe into the upper back and chest. Stay here for at least 10 breaths.

Bridge Pose
For a more active backbend, place a block between your inner thighs and plant the feet at hips with distance, feet parallel to the sides of your yoga mat. Begin to press down through the feet, inhaling to lift your hips up off the mat. Squeeze the block with your legs.
You may find that you can work your hands together under the body, interlacing the fingers and pressing down through the hands and forearms, gently moving side to side to come farther onto the shoulders. Take it slow, feeling the chest come up toward the chin, even relaxing the glutes and keeping the muscular work in the inner thighs. Gaze down the tip of the nose or close the eyes. Keep the breath active in the back of the throat.

Reclined Pigeon
Lay on your back. Hug the knees into the chest and rock a little side to side, massaging out the low spine. If you like, you can draw the knees in slow circles, going one direction 3 or 4 times, and then the other way. Rolling around the sacrum will help release tension and gently move synovial fluid to the joints in the vertebrae in the lumbar spine.
Next, bend your right knee and draw the right ankle to the outside of the left thigh. Reach down through the legs and grab the back of the left thigh, gently drawing the legs down toward the body. You can even tuck the chin slightly here to flatten out the spine. Breathe into the hip joint for 10 breaths, then switch sides.
If your hips and hamstrings are tight, I recommend sticking with this version of the pose, where you're reclined and you have the support of the ground beneath you to avoid any twisting of the spine.


Half Pigeon
If you're feeling a little more open and stable in the low back and hips, you can do half-pigeon. Start in down dog. Extend the left leg long with an inhale, and then draw the left knee up toward the left wrist. Bring the shin parallel to the front of the mat, or angle the ankle in toward the hip if you're less flexible.
Scoot the right leg (extended long behind you) in toward the mid-line of the body. If your left hip doesn't come all the way down to the mat, you can place a block or blanket under it for support. Take a deep breath and bring the chest up, extending the spine to begin.


As you exhale, slowly come forward, walking the hands in front of you. You can rest on the elbows or slowing come all the way down, bringing the forehead to the mat.
Keep breathing deeply, and let the body rest. The idea is to relax all the major muscles here and move into the deeper connective tissue, the fascia. Do your best not to fidget, breathing into sensation. If any thoughts or emotions come up, simply acknowledge them and move your focus back to the breath.

Supine Twist
Hug the knees into the chest and rock side to side. Let the knees fall over to the right and send your gaze over your left shoulder. If your legs don't reach the floor, place a blanket or block under them so you can relax. No muscular effort here. Let the shoulders and hips be heavy.
If you want a deeper stretch, you can also take one leg up and over, taking eagle legs as you do the twist.

Legs Up the Wall
Lay on your back with your legs extended up the wall. Relax the shoulders down to the mat. Close your eyes and breathe. This is a deeply restorative pose. Highly recommend it for a little break in the middle of your day, or for 5-10 minutes before bed!

Wide-Legged Straddle on the Wall
Extend the legs wide, finding a hip-opening stretch. Breathe into any area that feels tight, letting gravity draw the legs down. If this is too intense on the knees, skip it.

Butterfly (Baddha Konasana) on the Wall
Bring the soles of the feet together to touch, letting the knees go wide. Gently press on the knees, or let the arms rest by your sides and simply breathe. For any of these wall stretches, I recommend 1-3 minutes.

Savasana (Final Rest)
Lay comfortably on your back with your legs long down the mat, your arms by your sides, and the palms facing up. Let the shoulders and hips relax. Feel the whole body, heavy and sinking down. Allow your natural breath. Stay for at least 8-10 minutes, maybe even setting an alarm so you don't have to think about the time.
Savasana is the moment of integration, when all the effort of the poses sinks in. Your body, mind and spirit are rejuvenated. This is the most important pose of the practice, and sometimes the most challenging. Surrender.

Namaste
, my loves!
PS More reading for back pain and self-care...
Find
.
when you're in pain.
for helping you take care of yourself and stay pain-free.
Learn more about
protecting the sacro-iliac joints
during yoga.
Photo by Brynna Bryant of
Respiro Photography
.
Consider for a moment that everything is already perfect the way it is.
All the resistance you have toward your own life... let that fall away, even if only for a second.
Everything you need, it's right here.
You can
worry later
about what's for dinner, or what frustrating comment your partner said earlier today, or whether your jeans fit the way you want them to.
For now, notice what have you have. What you're grateful for. What effortless, beautiful, lovely place you're in.
This life.
Santosha
is contentment with what is. This is not an easy thing to practice. This contentment is at the core of yoga.


Alive in the Fire is a blog inspired by practicing yoga mindfully, teaching from the heart, giving hugs, and living a badass life.
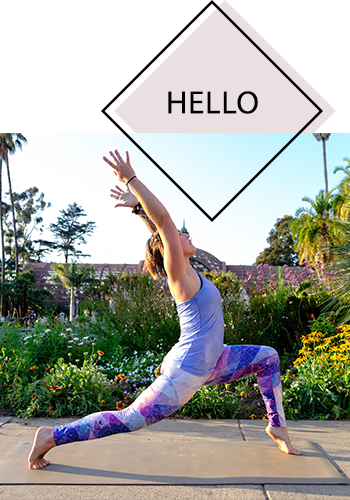
Alive in the Fire is a blog inspired by practicing yoga mindfully, teaching from the heart, giving hugs, and living a badass life.

work with me

Sponsored Yogis
Donations help keep the programs and yoga classes at Alive in the Fire available to those in need. Your generosity is greatly appreciated!

Copyright 2017. All rights reserved - Alive in the Fire. Design by Hello Big Idea.


Stories from the trail. My journey to becoming an ultra marathon runner.